***Warning... very long post... should break in into a few smaller ones... but it's too late... literally it's 12:02 am and there is no way...***
I've done it. The sleeve. And I am going to do another one. Ha!
OK, let's start from the beginning. I am not an expert, not even close. I have just started learning and analyzing the Bunka method, but I will try to make this as clear as possible, and explain everything I learned about sleeves.
Now, this intro might have scared you. When I started reading about sleeves last week, it scared me too. It seemed too complex... The Bunka books are good, but sometimes the descriptions of the illustrations are not so good. Sometimes you have to rely on illustrations alone.
When you start reading the instructions it will look complicated, but stay with me, and you will see at the end it is not so bad. I have done one sleeve, and I am planning to do another version for this top, just to compare them... once you've done it, it is not so bad. Trust me.
OK, so... so the first thing that might be intimidating is... there is no basic block for the sleeve. None. Not in the way the basic bodice is used to create a pattern. The sleeve is based on the shape and the circumference (the length of the curve) of the arm opening.
My first thought was - does that mean that I have to draw a different sleeve for each design I make? That could be problematic... but that's not completely true. Arm opening might not be different in all designs. Just as an example, if I had made all my sleeveless designs with sleeves - they would all use the same basic sleeve, because I have not really change the shape and thus the measurement of the curve of the arm opening.
From my limited experience with this method, it seems that most designs have either an unmodified arm opening (same as the bodice), a slightly wider one (moving part of all of the shoulder dart and part of the bust dart into arm opening), and a deeper one (involving the previous modifications plus deepening the arm opening below the arm). So really, if you used these three "basic" designs, you would really use tree "basic" sleeves. Then you could modify those "basic" sleeves to get different sleeve designs - flared sleeve, tucked sleeve, tulip sleeve, etc.
OK, but what is a "basic" sleeve? Well, this is where it gets a bit complicated. The shape and fit of the sleeve is based on the height of the sleeve cap - or the distance between the widest part of the sleeve (at the bust line) and the top of the cap of the sleeve (this will be clearer when I show you the sketches). So, if you want the tight fitting sleeve you will choose a high sleeve cap (which gives you narrower sleeve), but if you want a shirt sleeve, loose fitting, you will choose a short sleeve cap (which giver you a wide sleeve).
Yes, complicated, but when you think about it... it gives you flexibility to design any sleeve you want... to fit any bodice design (specifically arm opening) you want.
OK, so here is how it goes...
Since the sleeve is based on the shape of the arm opening, start by tracing the arm opening from your front and back patterns (note - these are patterns that do not include seam allowances). Draw two perpendicular lines - the horizontal line is the bust line, the vertical is the side seam extended up. Align your patterns along the sideseam, just at the intersection with the bust line and trace arm opening..
Find points 1 and 2 by drawing horizontal lines from tops of the front and back arm openings to the center vertical line. Mark A at the bottom of the arm opening. Then find B, which is half way between 1 and 2. Measure distance between A and B. Find point C at 4/5 of the length of AB. AC is now the height of the sleeve cap. Now, according to the Bunka books, the tight sleeve, the one with the highest sleeve cap, is calculated as 5/6 of AB length. On the other hand, the widest sleeve I found, the shirt sleeve cap height is 1/3 of AB. So the one I chose is on a tighter side.
Now, point D. Take your sloper and/or front pattern, and find the lower leg of the bust dart (see above). The intersection of the leg of the dart and the arm opening is D. Draw a horizontal line through D.
Next, we need to measure the length of the curves of the front and back arm opening. For that you can use your measuring tape and carefully curve it along the line, or use a piece of thread, "trace" is along the curve of the arm opening and then measure the length of the thread.In my case the back arm curve length (BAL) was 22.5 cm, and the front arm curve length (FAL) was 21.5 cm.
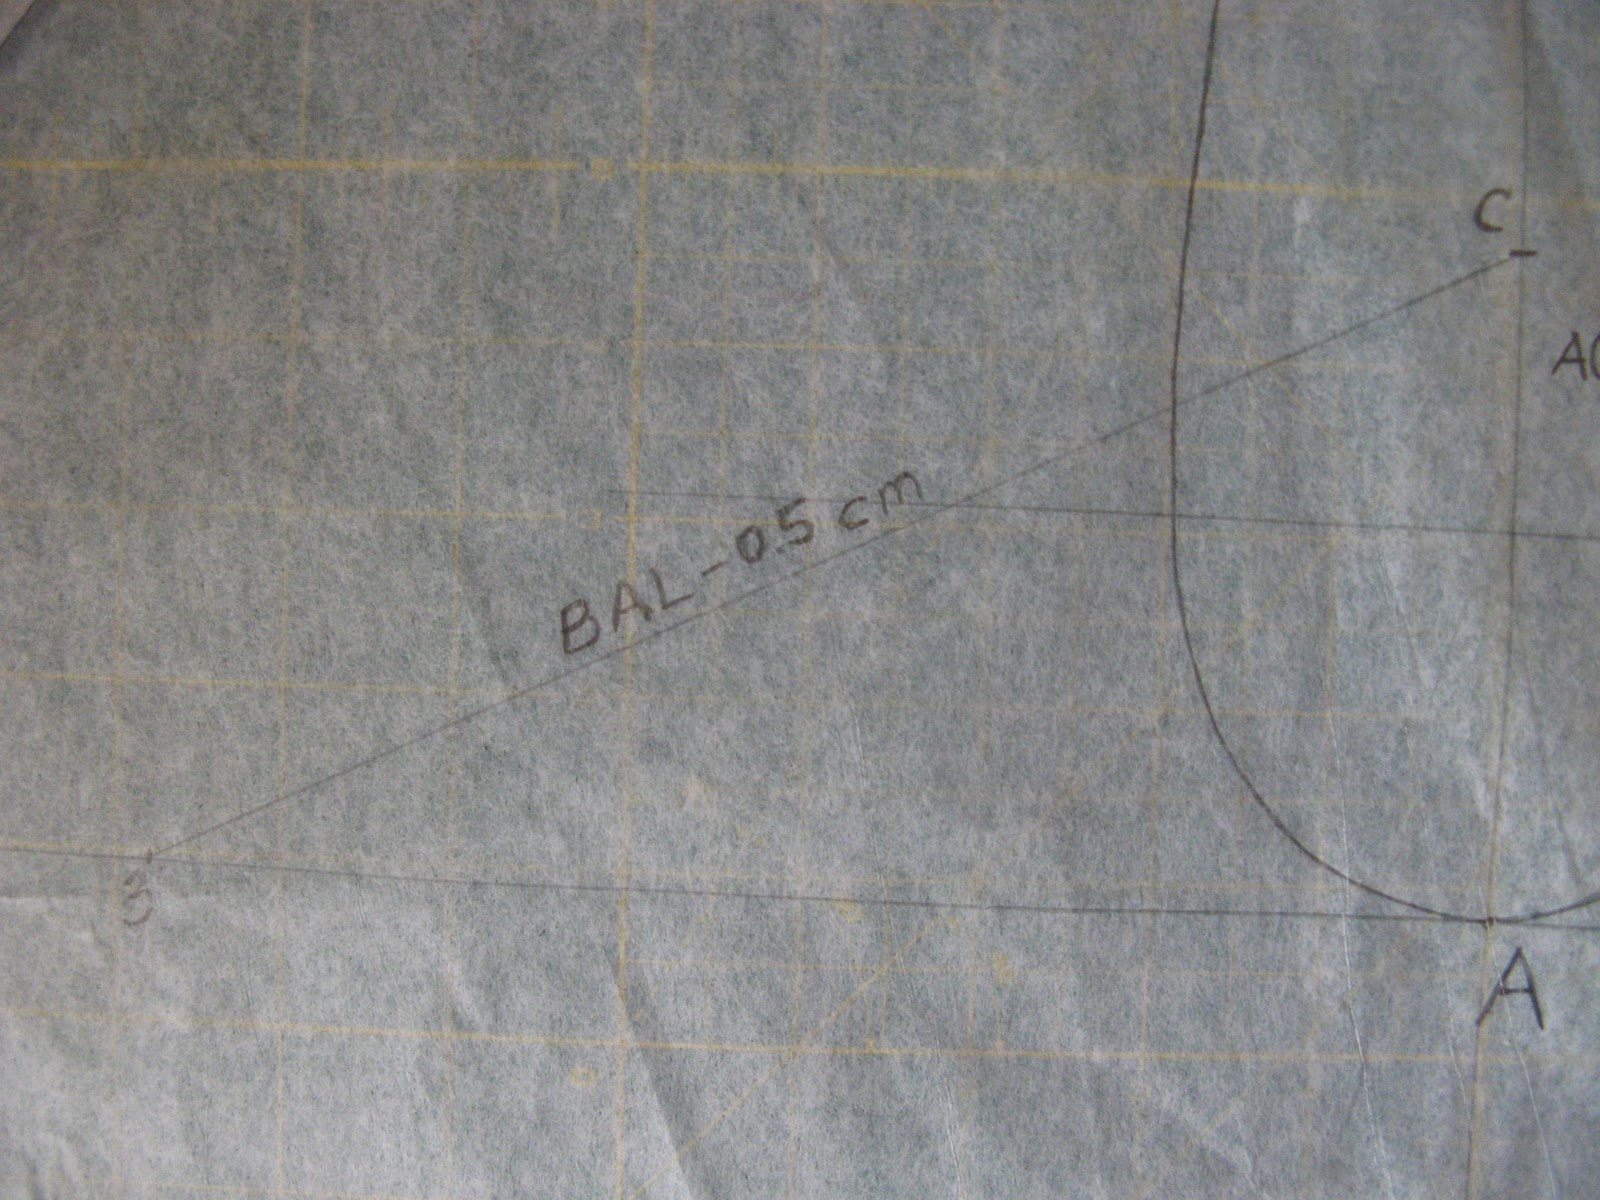
Now, draw a line from C to the bust line (horizontal line through A), BAL + 1 cm long. In my case that was 23.5 cm. You will need to move your ruler around a bit to make a line of that length from C intersect the bust line. Mark point 3 (see pic).
Do the same for the front... well, almost the same. Here the line from C to bust line is only FAL long - in my case 21.5 cm. What are these lines. These lines determine two things. First, distance between points 3 and 4 is the width of the sleeve. Second, the length you choose for these lines we drew (C to 3 and C to 4) determine how much ease there will be in the sleeve. If you are drawing a tight sleeve, you will need more ease than for a loose fitting sleeve (where you might have no ease at all - in which case these lines might even be shorter than BAL and FAL respectively).
One more thing here before we go on. You can see here how the width of the sleeve depends on the height of the sleeve cap. If C is higher, AC is longer, which will make C3 and C4 lines "closer" together and thus distance from 3 to 4 smaller = tighter sleeve. If AC is shorter - shorter sleeve cap, this will make points 3 and 4 farther apart, which means the sleeve width will be bigger = looser sleeve.
Now, let's move on to drawing the curve of the sleeve cap. On line C4, measure 1/4 of FAL from C, and then draw 1.5 cm long line perpendicular to C4. This is where the curve will go up from the C4 line.
Similarly, on the back, measure 1/4 of BAL from C and draw a 1.5 cm long line perpendicular to C3 line.
These 1.5 cm lines... I took this value from a sleeve I was using as a template for my design (from the Blouses and Dresses Bunka book). This determines the ease you have in your sleeve - the longer these lines, the more ease you have. I think that the largest value for these I've seen is for the tightest sleeve (which needs most ease) which was 1.8 - 2.0 cm.
Then, back on the front, draw a vertical line touching the front arm opening at the widest point. Intersection of that line with the bust line is A1. Measure distance from A to A1 and then draw another vertical line from bust line up to the curve at 2/3 of AA1 distance to the right of A. This part of the arm curve will be traced onto the sleeve curve at point 4.
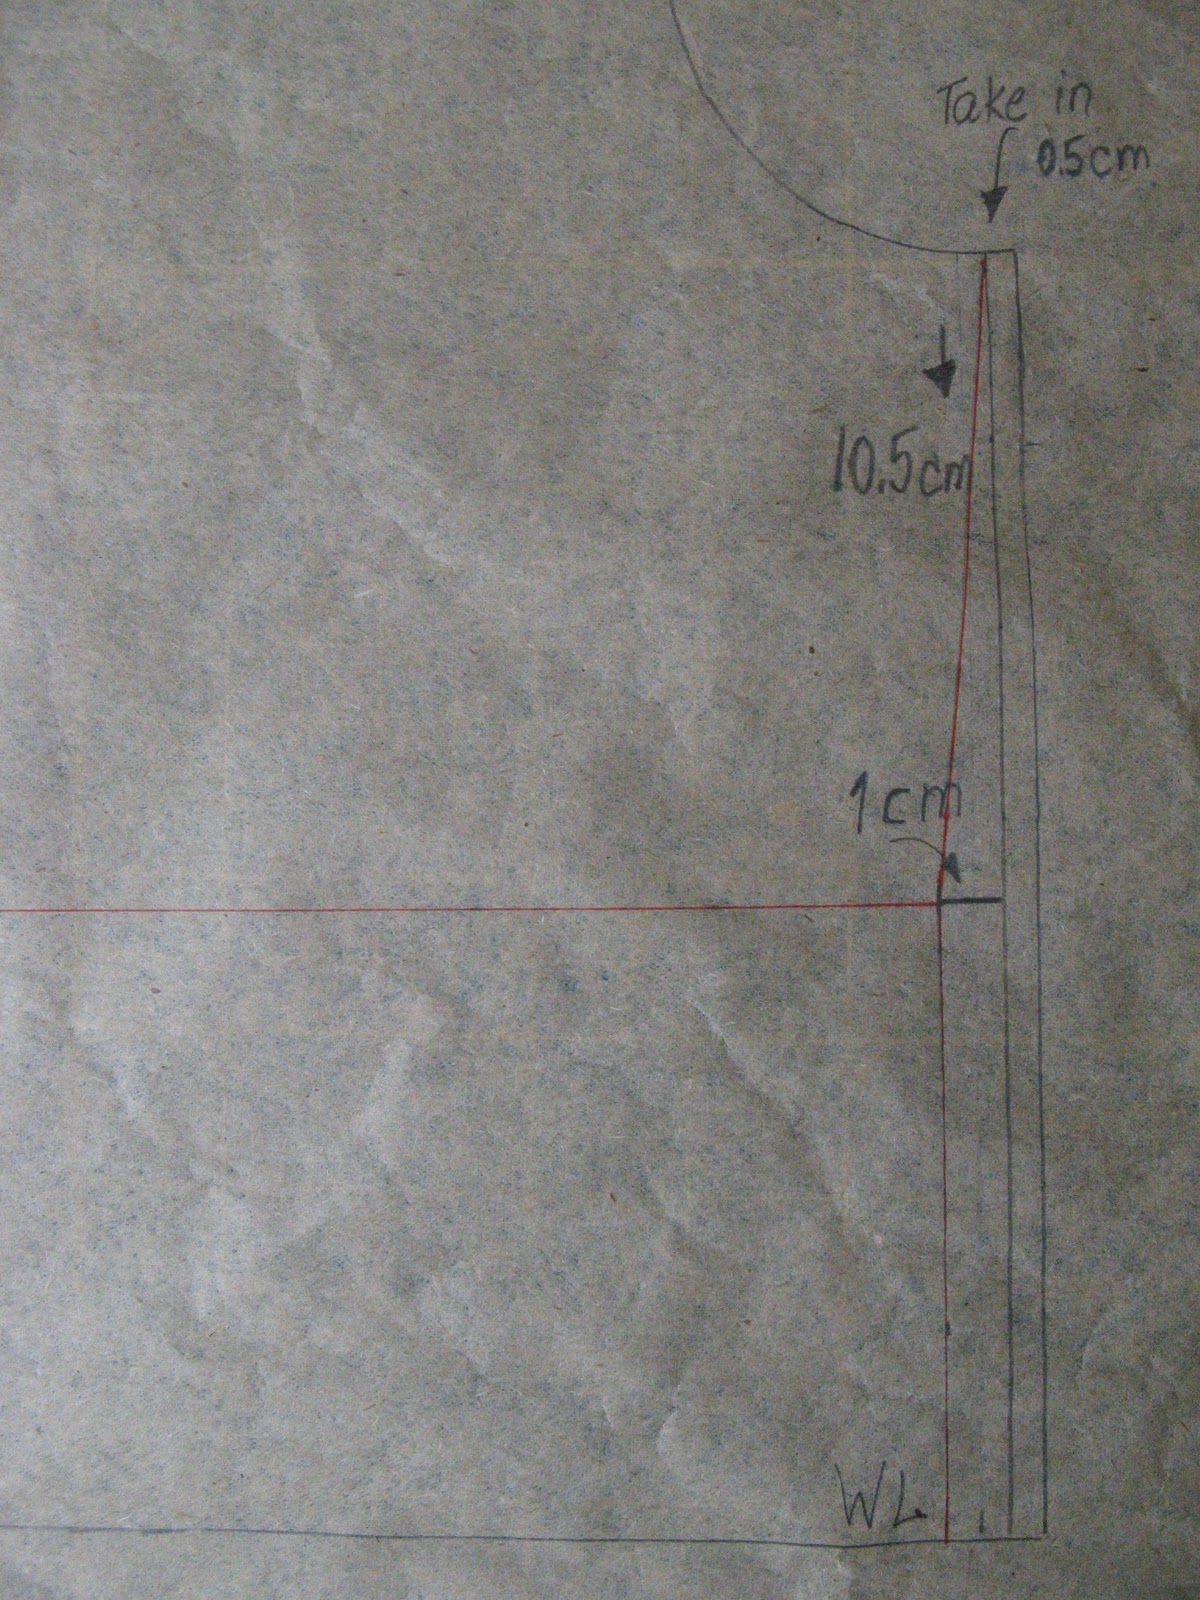
Also, mark D1 as intersection of C4 and a horizontal line from D. Find a point 1 cm up from D1. This is where the sleeve curve crosses C4 line. Or in other words, up from this point sleeve curve will be above C4 line, below this point, it will be below C4 line.
Repeat the same for the back of the arm opening (see pic above). One difference is that the crossing point will be 1 cm BELOW D2 point.
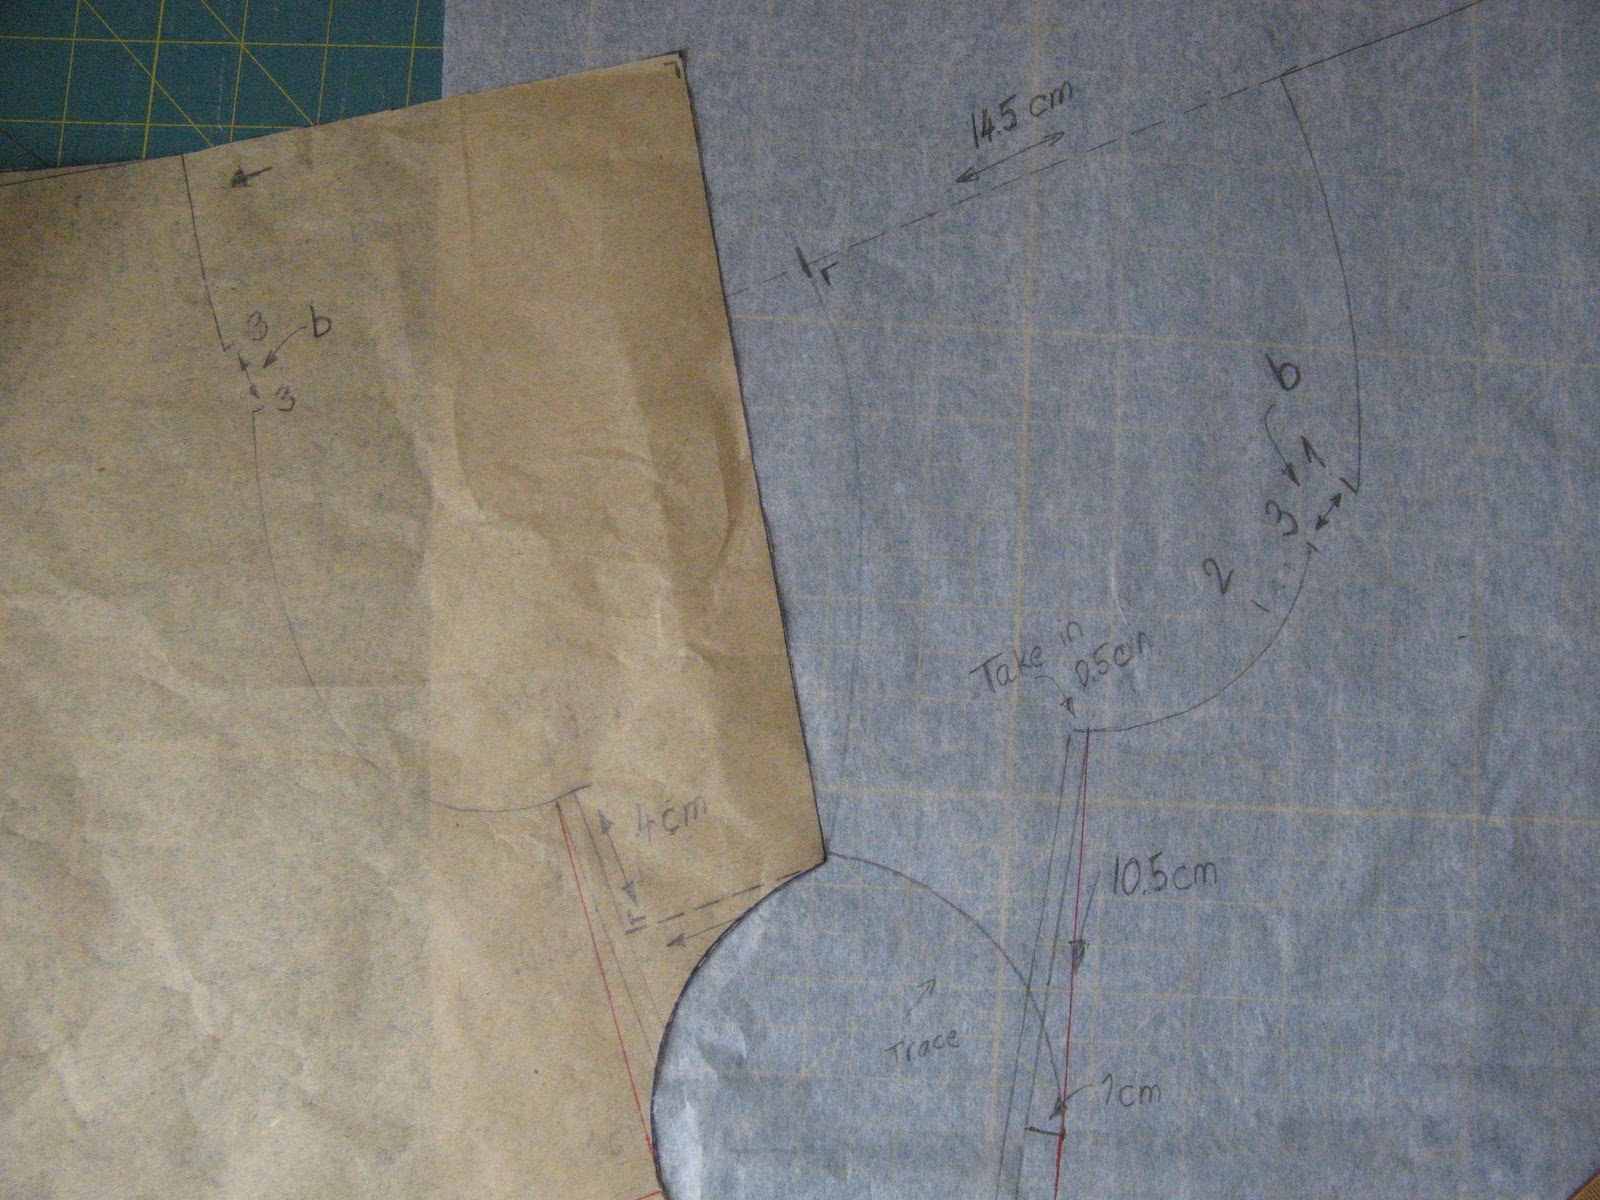
As I mentioned, the curves between A and A1, and A and A2 on the arm opening will be traced onto the sleeve curve. The easiest is to find the same points on your pattern. Lay the pattern on your drawing, and mark the points on the patterns.
Now, take the back pattern, turn it over and align the top of the shoulder seam with point 3 and trace up along the pattern to the mark you made in previous step. Similarly, take the front, turn it over, align with point 4 and trace up to the mark. You now have the start of the sleeve curve...
One note... below, you will find steps on how to find alignment markings for the bodice patterns and sleeve pattern. However, if you do not want to do that, you could get away with using point C as the "midpoint" of the sleeve - this point will align with the shoulder sleeve. Also, the ends of the curves you just traced with corresponding markings on the front and back patterns can also be used for alignment - these curves will match exactly and should have no ease added to them.
Now, you are finally ready to draw the sleeve cap curve.
In the back, the curve will go through C, above C3 line touching that 1.5 cm long line, then cross the C3 line 1 cm below D2 and finally connect to the curve you traced from the back pattern.
In the front... the curve will go through C, curve above C4 line touching that 1.5 cm long line, then cross the C4 line 1 cm above D1 and then connect to the curve you traced from the front pattern (these points have been marked red in the pic above)
Finally, add the length of the sleeve. In this case, I want a short sleeve, so I chose (guessed) 3 cm from the bust line. Straight down, no fanciness here.
The sleeve is done!!! Just for fun I wanted to find out how much ease I have in this sleeve. So I measured the length of the sleeve cap curve from C to 3 and C to 4. Turns out that I have 1.3 cm ease in the front (difference between the front sleeve cap length and front arm opening curve length) and 2 cm ease in the back. Honestly, this does not mean much to me, I just wanted to know...
As I mentioned above, you can stop now, and for alignment (between the sleeve and the front/back patterns) you can use point C and the two points that we marked on the front/back patterns when we traced the curves from the front/back to the sleeve.
Below I will show you a different method, also from the Blouses and Dresses Bunka book, that uses 5 alignment points.
First, mark alignment points on the arm opening (on the front/back patterns).
Measure distance A to 1 and then find points 2 and 3 (see pic above) such that distance A to 2 is same as 2 to 3 and also 3 to 1, which is 1/3 of A to 1. Then draw a horizontal line 1 cm above point 3. Where this line intersects the arm opening curve, mark points B and D.
Point E is on the front arm opening, at 1/2 of distance from A to 2 vertically up from A. Finally, point F is on the back arm opening, half way between A and B.
Overlay your front/back patterns and transfer points D, E F and B. Point C will align with shoulder seam.
Now the corresponding points on the sleeve...
Point E1 is on the front of the sleeve, such that the length of the front arm opening curve from A to E is the same as the curve form 4 to E1 on the sleeve cap.
For point D1... measure E to D on arm opening and add 0.3 cm. That will be the length from E1 to D1. Why 0.3 cm... Well, to tell you the truth I don't know. I worked off an example from the Blouses and Dresses Bunka book, and this seems to be one way of doing it. Basically the idea is to distribute some of the ease between these segments on the curve. If you remember I calculated ease before - on the front it is 1.3 cm. So if I have 0.3 cm in the E1D1 segment, the rest, 1 cm will be between points D1 and C. That does not seem too bad. I want ease, but not gathers...
In the back, the total ease calculated was 2 cm. So this will be distributed in all three segments. First measure A to F and add 0.3 cm to get the distance between 3 and F1. F1 to B1 is the distance between F and B plus 0.7 cm. The remaining 1 cm ease will be included between B1 and C.
Phew! Done. Here is the sleeve.
And here is what it looks like basted...
As I was basting the sleeve to the bodice... I was sKeptical. Very. It was not until I put it up on the dress form that I was... relieved. And happy, ecstatic really. It worked. Oh, my. It worked. Now imagine me dancing around fire singing "I made sleeve!"
Just look at it. I am soo proud!
But, yes there is a but, unfortunately... I have to try one more thing before I finish this. I want to draft a loose fitting sleeve. And see how it fits and what drape it will have and how it will change (if?) the design. I like this one, of course, but it seems a bit tight, a bit "conservative" for the lack of a better word.
Will be back with
sleeve 2.0
Previous Challenge 7 posts:
Challenge 7:: Faros tunic
Challenge 7:: Faros tunic: drafting everything except the sleeve + muslin