
Step 1: start with the sloper. Mark point A about 1/3 of of the neckline from the shoulder. Trace from A to midline, down midline and along the hem (waistline). Mark points 1 and 2 and trace from 2 along the shoulder line.

Step 2: put a pin into the tip of the shoulder dart and rotate the bodice clockwise until point 1 matches point 2 (basically closing the dart). Trace from A (point A on the bodice, see below) toward the shoulder and down the shoulder to point 2.

This is what you should have at this point.
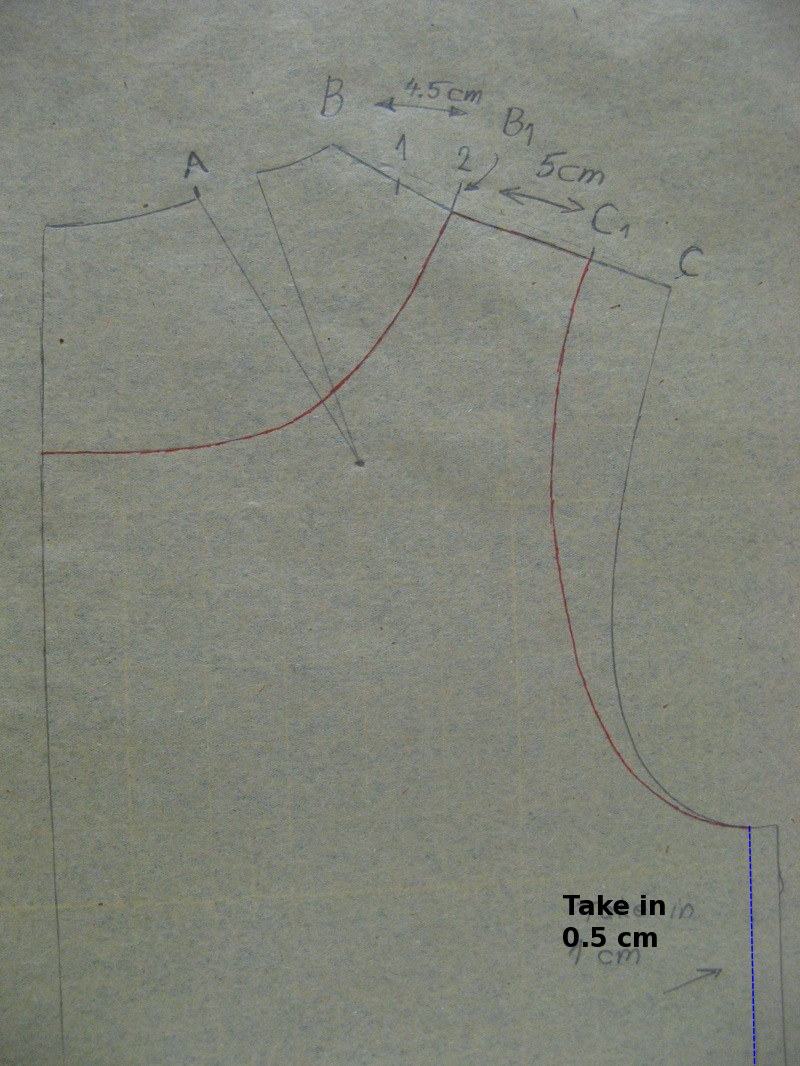
Step 3: Draw new shoulder: B to B1 is 4.5 cm; B1 to C1 is 5 cm. Draw a new neckline and arm opening. Take in 0.5 cm at the side seam. Draw a new sideseam parallel to the original (blue line on the pic above).

Step 4. Add length (I added 20 cm from the waistline (just extending the sideseam and the midline by 20 cm). Now let's shape the sideseam. Draw a notch on the new side seam 10.5 cm down. Extend the notch 1 cm in - this is just for shaping. Draw the new side seam (in red) from the top of the side seam, to the notch and then down to the hem line. I added a bit of room at the hem - just about 1 cm from the original side seam).

Step 5: taking care of the leftover dart at the neckline. I drew a deep neckline, but there is still a bit of shoulder dart left - about 0.5 cm. Instead of drawing in the dart and having it as a part of the pattern (and having to sew it), I redrew the shoulder seam, taking down point B1 about 0.5 cm along the neckline.

Step 6: make sure that the neck and arm curves are smooth over shoulder seams. Put front and back together at the shoulder seam and check. In this case I had to smooth a little bit (see blue line above).
That's it. Next is the finished top...
Previous Posts:
No comments:
Post a Comment