This one was too hard to describe, so I will try with a name. Lez top. Sleeveless top, cut under the bust, with gathers instead of the bust dart. Here is the inspiration:
(This is from a book -
Sewing Recipe - I recently bought and find very helpful for sewing tips and techniques).
Before we start drafting the front let me come clean about something... I already made this top. A few months ago. You can see the whole project
here. However, I started from a different pattern, not the sloper like I will do here, so the steps will be different. I am doing this because I need some time to create e-patterns for Weeks 1 through 4. The plan was to create them in one size and post for you to download and try.
OK, lets start. First, copy the front sloper:
This part is the same as in Week 4 challenge so you can look
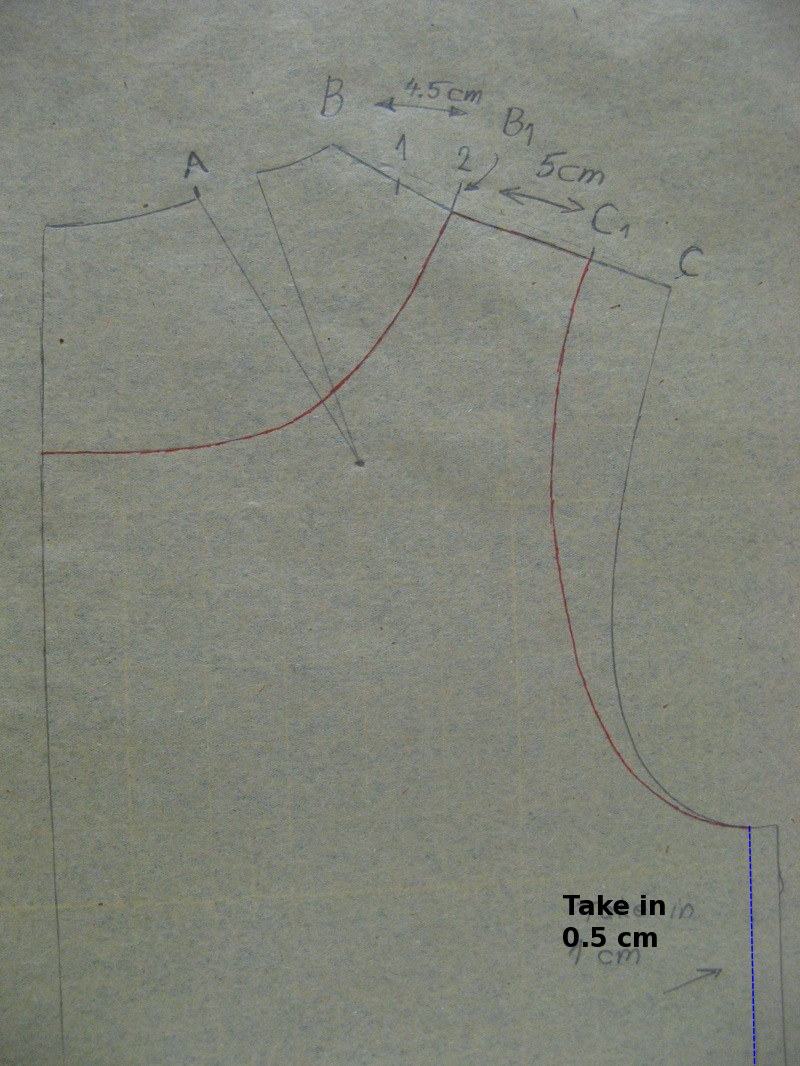
there (step 3 and step 7) for details. Draw in a new shoulder seam: A to A1 is 4.5 cm, and A1 to B1 is 5 cm. Draw in a new neckline - in this case, same as Week 4, I did a deep neckline - point C is 13.5 cm down the midline. Also, draw points D and D1. First square down from A and to the left from C. Draw a line from the intersection of those two and BP until it intersects neckline. That's D. D1 is about 0.5 cm away from D along the neckline. These two are needed to tighten a deep neckline. If your neckline is not deep, you can omit D and D1.

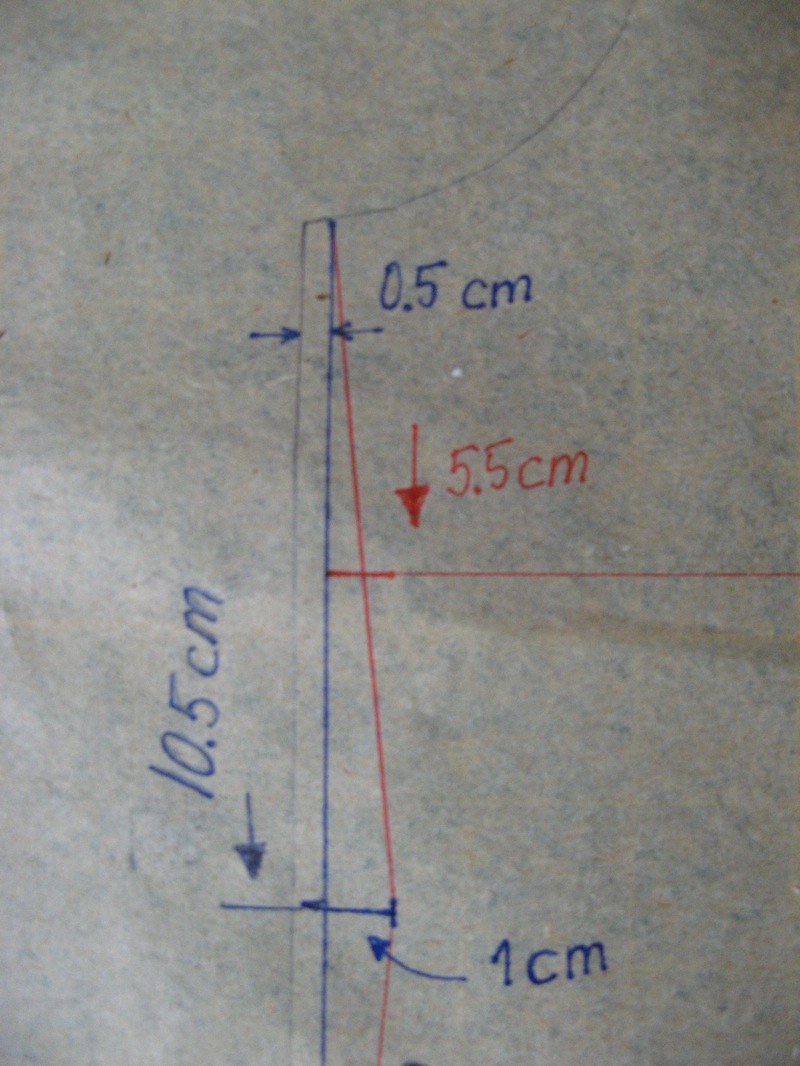
Now let's move on to the sideseam. First take in 0.5 cm (blue line parallel to the original side seam). Then draw a notch on the new side seam 10.5 cm down. Extend the notch 1 cm in - this is just for shaping. Similar as in
Week 4 challenge. Draw the new side seam (in red) from the top of the side seam, to the notch and then down to the hem line (where you put the hemline is arbitrary, in my case it is 20 cm down from the waistline). I added a bit of room at the hem - just about 1 cm from the original side seam).
The last thing to do is draw in the line where we cut the front pattern into top and bottom part. This line (empire waist maybe, or a bit higher? I wanted it to be just under the bust) is about 5.5 cm down the side seam (red horizontal line). Notice that we have not moved the dart yet. This is because it will be moved only into the top part of the front pattern. Now cut the pattern out and then cut along the red horizontal line to separate the bottom and top part of the front pattern. The bottom stays as is, no more modifications on it. We have a few more things to do at the top...
Draw in a line from BP straight down to the bottom.
Then cut out the bust dart and the little triangle between BP, D and D1. Also, cut along the line down from BP. That's where we will move the dart to, and the extra volume from the neck (D - D1). Cut almost all the way to BP, but not through. This way the three pieces stay together at BP.
Now close the bust dart and the the D-D1 "dart" and open under BP. Trace all around.
Draw in the new armhole, smooth the neckline, and connect and smooth the new dart. This will not be sewn in as a dart, instead we will use gathers. Gathers will extend beyond the dart - in this case the * are placed 3 cm to the right and left of the dart legs. Gather between those two points. Cut this out and you have a finished front. Two pieces: