Showing posts with label finished garment. Show all posts

6/18/12

Challenge 15:: Gima tunic:: finished

This is Gima tunic. For those that have not seen the intro post for Challenge 15, it's the sketch on the right, the one without the pockets.

It turned out a little bit different but I really like it. I wore it all day today, and it was really, really comfortable. 

The pics with me modeling the tunic are really bad, I know. I do need that tripod that has been mia for a while now. In the picture below I look like I have big bust, when I really don't - not that there is anything wrong with big bust; it's just really hard to take a picture holding the camera like this...


The tunic turned out a bot different than the sketch. For one it has more of an A-line, and I did not do hem pintucks. The fabric was too thin and I think that was the reason I had hard time keeping the tucks straight and parallel. Another reason was that the hem turned out to be a little curved - because of the A-line, and I didn't want to have make tucks on a separate strip of fabric (like I did for the sleeves) and add it on. Oh, and I wouldn't have enough fabric anyway. I could barely get these pieces as is.

Also, with the A-line, this top has more ease than in the sketch, making it more loose and really comfy.


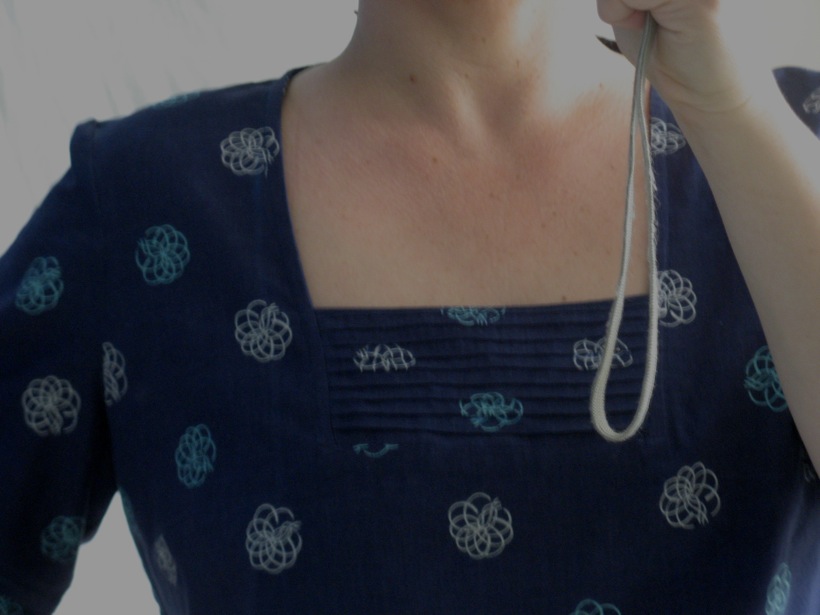
The closeup of the tucks in the front. I had a little "duh" moment here, almost had to do the tucks panel all over again (and I do not like to make mistakes; I do not like to have to redo things). When I cut the front, I cut it with the panel, I never really made a pattern for it. I thought I would leave the panel in (not cut it out) at first, to make sure the neck sits nicely. Then I would cut out the panel and use that as a template for the pintucked, finished panel. Well, I miscalculated the seam allowance, so instead of my usual 1/2 in, I ended with a 1/4 in. Almost wasn't able to fit it. The workaround was to use 1/4 in seam allowance which made the neck narrower by 1/4 in on both sides, but luckily that wasn't a big deal.


This is just to show you how nice and flat it sits on the chest. I didn't use any stabilizer on the panel. The pintucked, front piece was a little stiffer because of the tucks, and then I added the back to it, and it turned out stiff enough. Neck is finished with a bias tape.

(I need a bit of a tan)

And finally, the sleeves. Another "duh" moment. Well, sort of. When I drafted and cut the muslin, I did not take any width at he sleeve opening. It was simply straight. I though I would take it in after I make sure the sleeve fit well. I kinda forgot. So I cut strips for the pintucked part, made them as lond as I wanted the opening of the sleeve to be, and added some gathering to narrow the sleeve. Like a cuff, really. It turned out to be a nice little detail. However, when I do the other version of the tunic (sketch on the left) I will do a long sleeve, and then I will make a sleeve narrower at the opening.


Things will be quiet for a while here. School is done, and we are taking some time off to visit our family in Europe, so we'll be away until mid August. Then I will be back with more drafting. 

Previous Challenge 15 posts:
Challenge 15:: Gima tunic:: intro
Challenge 15:: Gima tunic:: drafting front and back
Challenge 15:: Gima tunic:: drafting sleeves, muslin


5/15/12

Challenge 14:: Rossa shirt:: finished

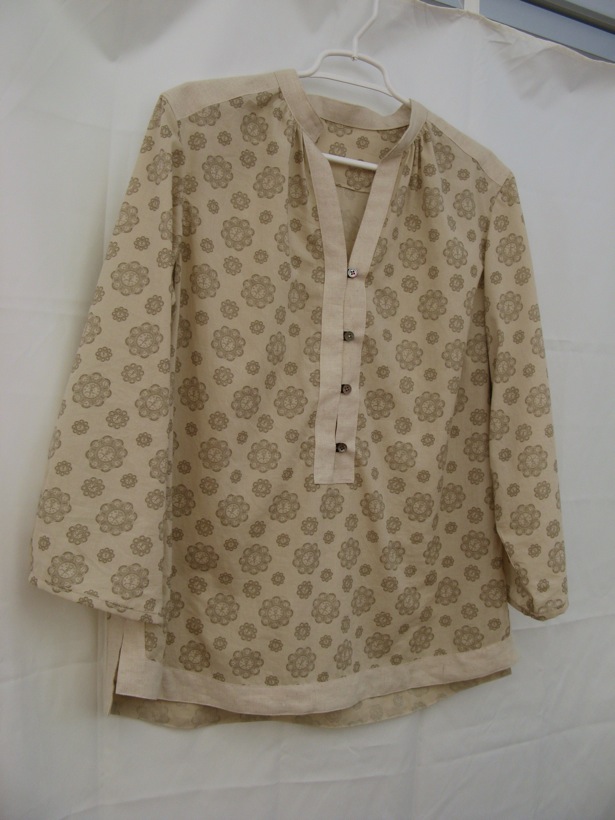
Here it is... On the right the inspiration (Sydney top from Steven Alan) and on the left my finished Rossa shirt.

I planned to take some shots of me wearing it this time. I really did. But I could not find my tripod... I haven't used it for so long. Next time, I promise.

The fabric comes from the local Fabric Planet and was bought very recently. I have to say it looked better in the shop than when I actually cut it.


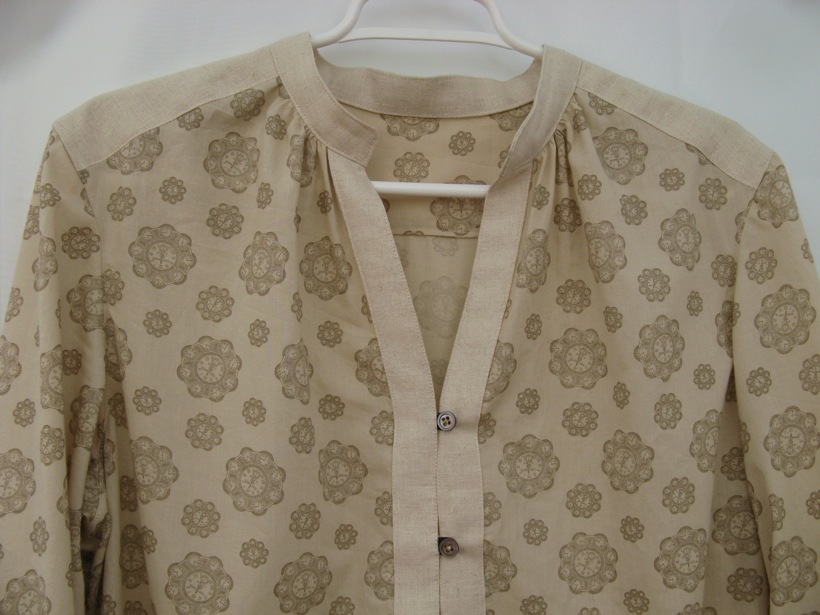
It looked to busy so I used some stash linen for contrast. I was debating using darker linen, to match the print (which is actually not flowers but clocks!), but the effect was - well, dark and drab. So I ended up using this lighter linen and I have to say I like the result.


I wish I could show you what it looks like on, but the pattern modifications I did made a difference. It looks really good with skinny pants... probably would with a skirt too, but I haven't try that.


The collar ended up perfect - no need to do any modifications. And it was really easier to put on than I have expected (not having much experience with collars). And the neck gathers add a nice little detail.

I did not know what exactly to do with the sleeves, so I simply used some bias tape (actually it wasn't cut on bias, I didn't want it to be stretch) and finished the end. 


Buttons gave me some grief. These are small buttons, so I was not going to make the loop out of fabric - too small. I didn't have time to go to the store, I needed to finish this (and adding these loops was actually the first step that needed to be done, so I couldn't put it off), so I ended up using some dark thin elastic I had on hand. Ended up being a little too thick, so it's wrinkling the fabric a little around the buttons. I definitely need to use something different next time.


All in all this was fun to make. Both pattern drafting and sewing (as I mentioned before, cutting fabric is not my favorite thing). And it wasn't that difficult too. I started from the basic sloper and a few modifications later I had this pattern. When you think about how much you modify finished patterns that don't fit - I think this is not too bad.

As a side note... this fabric made an appearance on another blog this week... it was made into a very different top. Go and check out at Cation Designs.

Previous Challenge 14 posts:


3/20/12

Challenge 13:: Pieve skirt:: finished

OK, and now for the finished skirt.
On the left is the inspiration from Boden and on the right is the skirt I drafted. It looks pretty similar - I don't actually know how much the Boden skirt flares at the hem - they don't give those measurements - but it looks pretty close.


And now for some details: skirt in the original pattern started at the waist and was about 56 cm long (22 in). I typically prefer skirts that sit a bit below the waist (the Boden skirt sits at waist) so I took off 2 cm from the waist. I cut the skirt using that pattern. Then I wanted to add the black "band", or maybe it would be better called a yoke, so I cut another 2 cm to use as the pattern for the "yoke". The second and third picture below show how I made the "yoke" pattern for the back.


And this is what it looks like on the form... I don't know if you can really tell, but it fits really well, slightly below the waist, to elongate the torso.

I was never very good at zippers, and I made an attempt to do an invisible zipper. It wasn't too bad, but in all honesty, It should be ripped out and put back in.

It's really hard to tell, but the picture on the right below is actually the back. Not very exciting, is it?
The fabric is a printed linen I bought downtown LA ages ago for $1/yard. I still have 2 yards left. The black yoke and the bias tape at the hem are also linen. 


I really like this skirt. I think it's just flared enough to be a little less formal then the straight skirt, but formal enough so you can make it as a part of a suit. I think a few variations are in order... 

Some techniques you might find useful:

Previous Challenge 13 posts:


3/9/12

Let's Recap

I am about to draft something different - a skirt this time, so I thought a little recap of the last few challenges would be in order...

Early this year I drafted a pattern which I (very plainly) called Basic Block 1. I wanted to create a basic pattern which I could use to make a number of different garments. But not just - change a neckline, or shorten, or different sleeve length type of changes, which are common in patterns that are published today. These are useful too, but I wanted to go a step further and show that by doing some relatively simple modifications (drafting), you can make patterns for garments  that are quite varied - from simple sleeveless top, to drop shoulder tops to strappy dresses (just to name a few).

Here is that basic block (easy fitting, but not too much ease; just enough to be able to pull over head with a wide neckline):

Basic Block 1

And here are the four garments I drafted using this pattern (clockwise from top left): Ulla top, Marina top, Blomma dress and Editt top.


Pattern modifications I used and explained were: simple neck and arm opening (re)shaping, adjustment of deep necklines, drafting french sleeve, moving bust darts (Editt and Marina tops) and drafting flounces. And these are really not that complicated and you don't need any special tools.

How many times have you been able to take a pattern and make a garment that fits you without any pattern modifications? So if you are already making these modifications, why not start from a basic pattern like this, and make a design you like. If you know a few drafting tricks, you can basically make anything you want. This is exactly what I want to show on this blog!

I will be making more of these. I will be adding a couple of different sleeve designs to show how you can mix and match to get even more designs. 

And if you are interested in learning how to draft a simple skirt, that's what I will be doing next.

3/7/12

Challenge 12:: Blomma dress:: finished

I have no idea why it took so long to get this one done! And it is a relatively easy project. Well, maybe because I had two other projects floating in my head. The ones that fall under the "must try right away" category.

And then yesterday I had to go downtown (the LA Garment District). Yes, I did say "had" to because I needed some white fleece for a design wall I (my dear Mr.) will be making this weekend. The movable design wall will not only be useful for my quilts, but I plan to use it when I cut fabrics like chiffon or silk, those that just move too much to be cut on a slippery surface - like my hardwood floors where I do all my other cutting, quilt basting and such. Of course I bought other fabrics too (:-)

OK, back to the dress. In the previous post I mentioned that the only change to the pattern I would make is to make the top flounce (yes, that's the word, not "ruffle"; thank you katherine h) a little narrower on one side so that you can actually see the flounce below. Well, it turns out I did not have to make any changes, because I sewed the flounces on the muslin wrong - the top one under the bottom one. This is what they were meant to look like.


Just as a reminder, this is the picture that was the inspiration for the dress (Abaete top), and next to it is the pattern I used. For those of you who might have stopped by here the first time, this pattern (free download) is my basic basic block for an easy fitting top, which I used to make Ulla, Editt and Marina tops in previous challenges.


For the dress I used a cotton I bought long ago downtown LA. I remember that the roll said it was cotton but the guy was telling me that it had to have some silk in it. I thought he was just trying to sell it (shopping downtown is an experience), but it did feel very silky. It is very light (would that be lawn?) and thin and I wish I had more of it. When I first ironed it, it started sticking. So it is probably not 100% cotton, but it did not iron like poly. So could it have some silk in it? Don't know much about silk, and except for one abandoned project, have never worked with it.

(It was windy today when I took the pictures)


Instead of hemming the flounces, I serged them. I thought a hem would just make them bulky on the edge and I did not want it. I finished the neck, arm and back with bias tape made of the same fabric (I really like doing that). The neck is done with one piece, and then the straps, under arm and the back are another piece. I like doing straps like that too..


In the back - because of the ease and the fact that it's a pull-over dress, I put some elastic under the bias tape, to keep it next to the body. 


I really like how it turned out, and I think it would be a nice dress/tunic even without the flounces. Just a little slip. I might make another one...


Some techniques you might find useful:


Previous Challenge 12 posts:
Challenge 12:: Blomma dress:: intro and drafting

Challenge 12:: Blomma dress:: muslin


2/18/12

Challenge 11:: Marina top:: finished

Marina. 

I don't know whether it was the lighting, or just the fact that this dark blue makes a big contrast against the white background, but this was hard to photograph. And I am no expert. This is the first time I had to modify the pictures a bit. Just a bit.


I used a piece of fabric from my stash. I am still keeping with the promise (you know the one I would not buy anything until I absolutely have to. The definition of "absolutely" is a little... vague...)


I really like this fabric. It feels silky; it is on the thicker side though - you could easily make a skirt out of it. Or a dress. Not sheer at all. I don't think it's silk though, probably some made-made fabric. But it really feels good. It is not slippery and I did not have any problem sewing it. (I had this nightmarish experience recently with pure silk. My machine just would not sew through it. I could not figure out why. I changed needles, tension, thread. Nothing. I ended up serging anything I could. Everything else I sewed by hand.)


The fabric is dark blue with some leaf (?) pattern. It ironed perfectly, and does not wrinkle much. I barely had enough for this top (I had to cut the back from two pieces, so I ended up with a back seam, and the bow collar ended up not as wide as I planned). 


The reason I had so little of the fabric is that actually I have used it before. For a top I really liked. Then I washed it. I know, I should have washed the fabric before, which I usually do with my cottons and linens. But this time I wasn't sure if I should wash this. And then I did - after! sewing it. And it shrank so much, and it completely changed the feel, I had to toss it. So I know for sure this is dry clean only.


As you may have noticed, I do not have a pattern piece for the bow collar. It is simply a straight piece of fabric - I think I cut it about 12 cm wide and as long as the width of the fabric. You can also cut it on a bias, but I did not have enough fabric for that.


Since there is no buttons in the front I could not really sew the bow all the way down to the bottom of the V neck ( Also, it would not tie nicely). So I sewed it down about half way from the shoulder. You could wear it tied or not. If there is an interest I will write up a little tutorial to show how you sew this.


Overall I like it. The arm openings are a bit deeper, so if I make this one again I will redraw them without the 2cm drop down the side seam. The top has a lot of ease but I like that with this design. 

Some techniques you might find useful:

Previous Challenge 11 posts:


2/6/12

Challenge 10:: Editt:: finished

Editt: all finished. 


I decided to go with different fabric, from what I showed in the drafting post. I though that fabric, which is a shiny, thin beautiful cotton, was too stiff, and wouldn't drape fluidly enough. 


Instead, I went with another fabric from my stash, something I bought many years ago. A very thin, slightly crinkled, man made material. But it was silky enough for this design. 


I was very worried about working with this fabric. It is a little chiffon-like, but less shifty. Almost no bias stretch at all. I worked once before with chiffon, and it was a nightmare. Ended in a trash bin. So I ran out to buy a large piece of fleece, because I read once, somewhere, that to cut chiffon without shifting, you can place it over fleece. And it worked. Not that I enjoyed it that much. But it worked.


The tough part was doing the bias strip around the neck and arms openings. It was so slippery. I ended up using the smallest zig-zag stitch to finish it, to make sure it does not slip away. One good thing is that my machine did not attempt to eat the fabric, not even once. I had that experience once with silk. Never finished that project, because I could not figure out what the problem was.


All in all, this turned out very nicely. It took a bit longer than expected, because of the fabric, but I am very happy with it. I have to say though, my favorite fabrics to work with, by far, are linen and cotton. But you can't make everything out of cotton. Or can you?


I had some left over fabric, so I made it into a scarf. Long enough to tie around the waist. 

Some techniques you might find useful: